Sunday, October 11, 2015

Tim Holtz "Crazy Birds" and Lawn Fawn "Love You Latte" Christmas Card


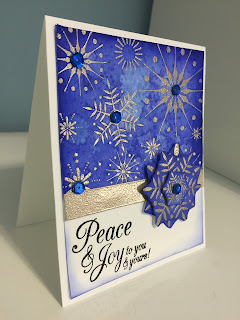
Okay, honestly, this is my favorite card that I've made!  I ABSOLUTELY love it!  I'm pretty sure, that I'm going to have to keep it for a Christmas decoration on my mantle ;)  I started by choosing my stamps and coming up with an initial plan for my card.  Then...I started playing!


The Zig Clean Color Real Brush markers arrived in the mail a few days ago and I hadn't had a chance to try them out yet.  So, yesterday when a couple of friends came over for a crafty day, I pretty much just worked on organizing, labeling and trying out these AWESOME watercolor markers.  Naturally, I had to use them for my card today.

This is the chart from Jennifer McGuire's Website.

 I stamped my images on some Canson watercolor paper and then started coloring them with the colors pictured below.   


The awesome thing about these markers is the fun blending that you can acheive even with colors that are far apart on the color wheel.  For example, I used brown and green on the female bird and red and brown on the male bird. 


After I colored and cut out my images, I added Memento black marker all around the outside of the cutouts to give them a finished look.


Next, I took my Copic Multiliner and added sketch lines on the hot chocolate and milk mugs to match the sketchiness, (?made up word?), on the Crazy Birds.


I decided that I needed a place for the birds to place their drinks, and I don't have a table stamp, so to Google I went.  I searched images of "cartoon tables" and then did my best to sketch one out.  It turned out pretty good considering the fact that I don't consider myself an artist, just a crafter ;)


I colored the table with the same browns that I used on the two birds to keep some continuity for the card.


So, at this point I went a little crazy, pun intended, with sparkle card stock for the wallpaper and a hand drawn wood floor.  Again, I used the same browns.


The last few pictures are of the finishing touches.  Shading under the table and birds with the Zigs.  Inking around the edges with Distress Ink.  Distress Glitter on the Santa hat, glossy accents on the mugs and flower, and die cut hearts to finish it off.  Okay...that was a mouth full....But, OH. SO. MUCH. FUN!!!


I stamped the "Happy Holidays" sentiment,
but the paper is very textured so I didn't get a great impression.
I expected that.  So...I went over it with sharpie...and tada!

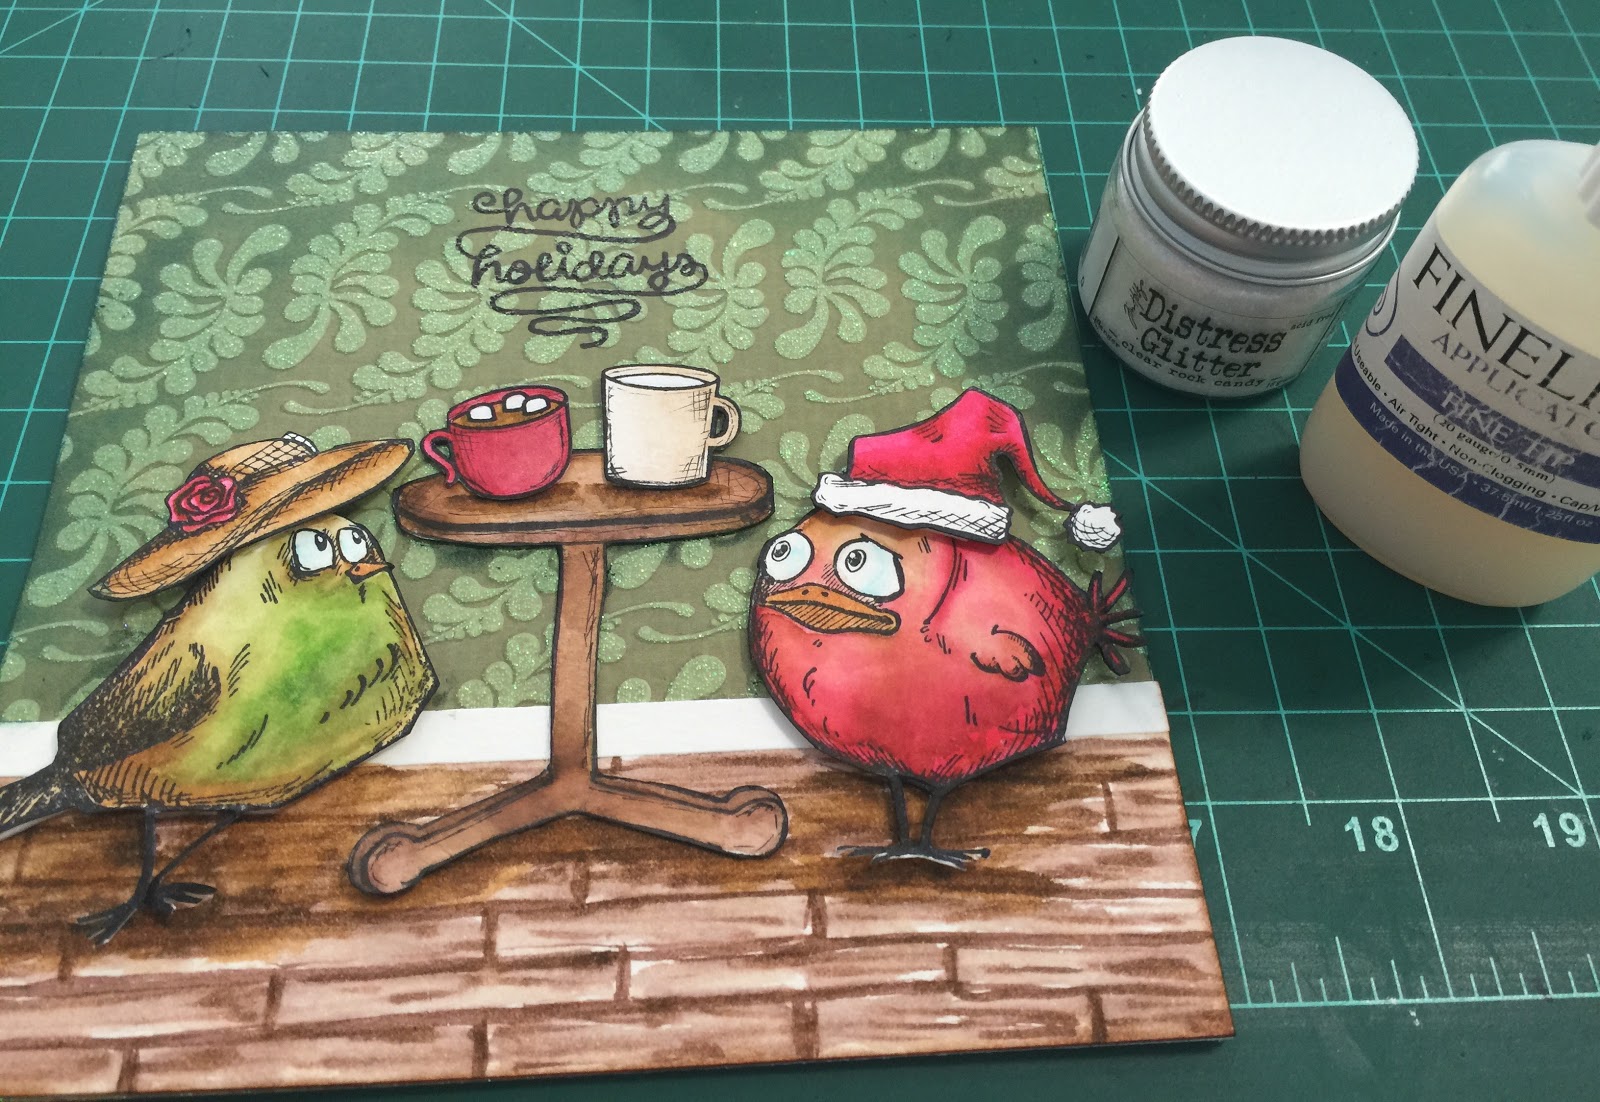
I added Glossy Accents to the hat and then put
Distress Glitter on top of the Glossy Accents.
It's very chunky and fun in real life.
Lastly, I stamped the large and medium hearts from
the Crazy Bird Accessory stamp set on some die cut
hearts and then colored them with the same Zig markers. 
I just love how it turned out!  Happy Holidays everyone! 
Enjoy the cold weather that should be coming soon!  :)


Remember, 
Let your sparkle shine!!!

I would like to enter this in the following challenges:


Saturday, October 3, 2015

Simon Says Stamp "Sending Happy Thoughts" Birthday Card

I woke up this morning at 6 and found the creative energy that I was lacking yesterday to work on my dad's birthday card.  I like to get up before my kiddos wake and get a few things done...today that was this card :)  I received this stamp set from Simon Says Stamp's card kit July 2014.  I have used it on three different cards so far.  I just love it's versatility. 


I started by laying out the stamps that I intended on using and coming up with a rough idea for the card.  At first I thought I might make some envelope embellishments to sprinkle on the card, but ended up deciding against it.


I stamped the images in Versafine Black Onyx Ink and embossed them with some clear embossing powder.   


Next I did some simple, three shade Copic coloring.  


I looked in my color swatch book and found three perfectly coordinating ink colors to stamp a decorative rope edge for the top and bottom of the card.  I cannot even tell you how happy the ink swatch book makes me!


The above was my first attempt at the rope.  Honestly, it was kind of a booger to get stamped correctly.  It still isn't perfect...but...good enough ;)


  I added dimensional adhesive to the back and stamped a birthday sentiment on the inside of my card. 


Lastly, I added some fun finishing touches.  I colored the stars with the same Copic colors that I used on envelopes.  I took the adhesive off the gemstones and used Glossy Accents to glue the little bits down.  Finally, I used Wink of Stella on the packages and stars.


The picture below is my attempt to capture the dimension and sparkle on the card...fail...I'll figure all this out eventually...hahaha!


Remember,
Let your sparkle shine!!!

I would like to enter my card into the following challenges:


Friday, October 2, 2015

Beautiful Koi Watercolors


Beautiful Koi Watercolors 

It is very rainy here in South Carolina, canceling kids soccer and tennis commitments and leaving my night open for crafting.  I sat down to make a card for my dad's birthday that is coming up this month, but I struggled to find inspiration.  Masculine cards can be difficult, am I right?  So, instead I moved onto some more organizing for my color swatch book.  I found this idea on Jennifer McGuire's website...and. I. LOVE. IT!!!  I have been working on swatches for all of my inks and tonight I finished off my watercolor collection.  I only have two types of watercolors so it didn't take too long.  


Koi Watercolors
They come in this very convenient travel box with a water brush and pallet included.
 I started by cutting some Canson watercolor paper into 2" squares.


Next, I painted with each color in a horizontal direction, in order to show the range of hue if I used more or less water.


After that I labeled my swatches.  As far as I can tell the Koi watercolors don't have specific color names.  So, I used their row and column to specify which is which.  That way, when I look in my notebook to find the perfect color I can easily find it's location in the box.


Above is probably my favorite part.  I combined all my watercolor swatches into rainbow order so that I can put them into my notebook for easy reference later.  Oh my word, I love the beautiful colors!!!  Please tell me I'm not the only crazy person that loves organizing and labeling almost, if not as much as, actually crafting a project :) 

A peak inside my ink swatch book


Remember,
Let your sparkle shine!!!

Thursday, October 1, 2015

My First Challenge

Pinterest Inspired Challenge


I am certain there are going to be a lot of firsts throughout this blogging process.  Here is one of them.  I am participating some online challenges:
Pinterest Inspired Challenge#1
30 Day Color Challenge
Simon Says Stamp Wednesday Challenge #534

This is the inspiration for Pinterest Inspired challenge.


I have already realized that I need to take more pictures while I am creating for this exercise.  I whole heartedly delved into the creative process and barely remembered to take any shots.


I know it isn't Christmas time quite yet...buuuut...If I am going to actually mail out a ton of cards, I better get started...right?!

Here is my completed card.
I started by embossing my snowflake background with Ranger Liquid Platinum embossing powder.  Next I watercolored with Blueprint Sketch Distress ink, adding ink drops and water droplets for interest.  After that I embossed the background a couple more times so that I could make a matching 3D snowflake embellishment.  The strip across the middle is also embossed w/ the Liquid Platinum.  I added some sequins for detail and finished it off with the Hero Arts Christmas sentiment.

I am so excited about sharing this adventure!!!!!!  
Let your sparkle shine! :P)


Below are some pics of the supplies that I used, because I haven't figured out how to link them yet...hopefully soon ;)


Wednesday, September 30, 2015

The Beginning


Hello, my name is Rachelle and I have a paper addiction...lol!  And for the first time I am going to attempt to share my creativity with the world, but... it. is. daunting!  There are so many different social networks that I know I must connect to, eventually, if there is even a chance of anyone other than my family and VERY close friends seeing any of this.  This is as far as I got after 30 minutes of my kiddos' "recess" today.  Now, it is quiet time and I don't have much creative juice left.  Yet, I am attempting to figure out the beginning of my new adventure in blogging.  For today, I will simply share a small sampling of cards that I have made over the last year.


Copic Colored with paper background.
Stamped using the "cut out masking" technique.

Die Cut center with a Copic colored sentiment.
The backgrounds are white heat embossed and inked with Distress Inks.

White heat embossed and watercolored.

This is one of my first Copic colored cards.  I used Distress Inks for the sky.